Work in progress, we are currently filling in the help enviroment.
Distribute
Updated on:
March 21, 2024

Exports

KatanaPIM's Export functionality is designed to create downloadable .xlsx or .csv files containing product data. You can tailor the set of exported products based on your specific needs, ensuring only relevant data is included.

on this page:

KatanaPIM offers three distinct export options, each serving different purposes, or "goals":

  1. Products: This option enables you to export your products using our advanced selection tool, allowing for precise customization.
  2. Variant Relationships: Specifically designed for exporting variations, providing a streamlined solution for managing variant relationships.
  3. Pricebook Items: Tailored for exporting pricebook items, facilitating efficient management of pricing data.

Selecting the appropriate export type based on your specific requirements ensures a tailored export process.

Products export

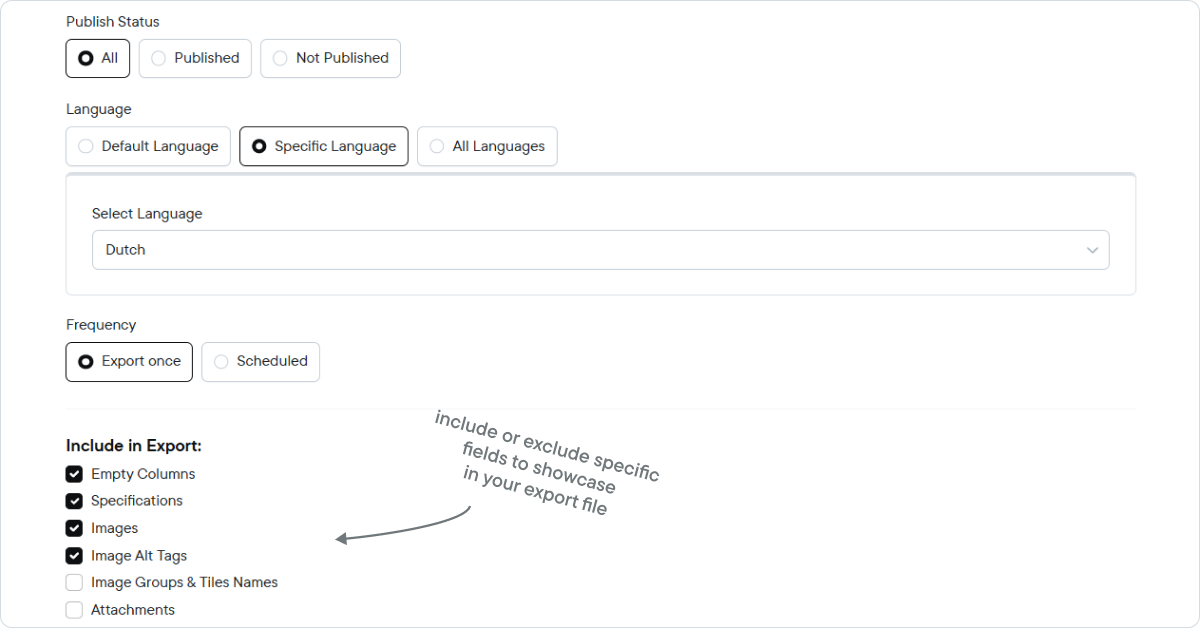
With the Products export, you can export essential product data tailored to your needs. Select products, apply filters, and customize settings with ease.

  • Accessing 'Exports': from the dashboard, navigate to "Export/Import" and select 'Exports'.
  • Initiating a new export: Click on the 'New Export' button to begin a new export process.

Configuring your export

  • Selecting export goal: Choose the goal of your export, in this case 'products'. You can opt to export all products or create a customized selection.
  • Advanced filtering: if you select the "create selection button", you can utilize advanced filtering options to refine your selection based on product type (simple or variants), other filters (such as 'category'), or specifications (like ''color'').
  • Customization options: Tailor your export file by specifying preferences such as publish status, language, export frequency, and inclusion/exclusion of certain fields (e.g., empty columns, specifications, images).
  • Publishing options: Decide whether to publish your export as a feed. You can assign a name and adjust the file name as needed, along with selecting the export format. If the file name is not changed, this field will take the same name as the "export name".
  • Starting the export: Once all configurations are set, click on the 'Start Export' button to initiate the export process. On the right-hand side of the export button, you'll find an overview of the number of products being exported.
  • Download your file: After the export is complete, you can download your file from the export log within the system.

Variant relationships export

The Variant relationships export allows you to export basic fields related to your products variations. The export file will include the Child products ''name'', ''extenal key'' and SKU, the Parent ''name'' and ''external key'' and the Granparent ''name'' and ''external key'' (see example below).

http://marketing.katanapim.com/variant-relationships.xlsx

  • Accessing 'Exports': from the dashboard, navigate to "Export/Import" and select 'Exports'.
  • Initiating a new export: Click on the 'New Export' button to begin a new export process.

Configuring your export

  • Selecting export goal: Choose the goal of your export, in this case 'variant relationships'.
  • Customization options: You can tailor your export choosing the export frequency (export once or schedule recurring exports)
  • Name your export: You can assign a name and adjust the file name as needed, along with selecting the export format. If the file name is not changed, this field will take the same name as the "export name".
  • Starting the export: Once all configurations are set, click on the 'Start Export' button to initiate the export process. On the right-hand side of the export button, you'll find an overview of the number of products being exported.
  • Download your file: After the export is complete, you can download your file from the export log within the system.

Price book export

The Pricebook Export feature in our PIM system allows users to efficiently export customized pricebook data for use in various applications such as ERP systems, marketplaces, sales channels, or for internal analysis. This feature provides flexibility in how data is exported, ensuring that the exported data aligns with your business needs.

  • Accessing 'Exports': from the dashboard, navigate to "Export/Import" and select 'Exports'.
  • Initiating a new export: Click on the 'New Export' button to begin a new export process.

Configuring your export

  • Selecting export goal: Choose the goal of your export, in this case 'pricebook items'. You can opt to export all products or create a customized selection.
  • Advanced filtering: if you select the "create selection button", you can utilize advanced filtering options to refine your selection based on product type (simple or variants), other filters (such as 'category'), or specifications (like ''color'').
  • Customization options: Tailor your export file by specifying preferences such as publish status or export frequency.
    • Create new price book items for selected products: When this box is checked, new pricebook entries will be created for the products you've selected. It's typically used when you need to add new products to the pricebook or update pricing for existing products.
    • Copy price to special Price column: When selected, you copy the product's standard price into a special price column. This could be used for promotions or special pricing strategies where you might want to keep the original price visible but also show a discounted or promotional price.
    • Don't create new items for products that have price book items: This option, when checked, ensures that no new pricebook entries are created for products that already have an entry. It prevents duplication of entries and ensures the pricebook contains only unique product prices.
    • Batch Name: This field is where you enter a name for the batch operation you're performing.
    • Name and file name: you can assign an export name and adjust the file name as needed. If the file name is not changed, this field will take the same name as the "export name".
  • Starting the export: Once all configurations are set, click on the 'Start Export' button to initiate the export process. On the right-hand side of the export button, you'll find an overview of the number of products being exported
  • Download your file: After the export is complete, you can download your file from the export log within the system.

Export page fields explained

Here is an explanation of the various fields and options on the export page:

  1. Goal: This section allows you to select the objective of the export.
    • Products: Exporting product-related data.
    • Variant relationships: If your products have variants, this option may be used to export data that shows these relationships (the export will include the products names, external keys and SKUs).
    • Pricebook items: Exporting pricing information.
  2. Products:
    • All products: Exporting all the product data available.
    • Create selection: Allows for exporting a specific selection of products, likely based on certain criteria or filters.
      • Product type: This allows users to filter products through a multi-selection.
        • Simple: A stand-alone product with no variants.
        • Child: only ''child'' products
        • Parent: only ''parent'' products
        • Grandparent: only ''grandparent'' products
      • UNIVERSAL FILTERS: These are broad filters that apply to all products.
        • Category: Filter products by their assigned category within the catalog.
        • Store: Filter products based on the store they are associated with, if the business operates multiple stores or channels.
      • SPECIFICATIONS: This section allows for filtering based on specific product attributes.
        • Height: Filter products based on their height specification.
        • Color: Filter products based on their color specification.
        • You can add or remove specification filters by enabling the ''admin filter'' on the specification detail page.
  3. Publish status:
    • All: Includes both published and unpublished products in the export.
    • Published: Only includes products that are currently live or visible on sales channels.
    • Not published: Only includes products that are not live or not visible on sales channels.
  4. Language:
    • Default language: Exports data in the default language set for the system.
    • Specific language: Allows you to choose a specific language for the export.
    • All languages: Exports data in all available languages.
  5. Frequency:
    • Export once: A one-time export of data.
    • Scheduled: Sets up a recurring export that happens at regular intervals.
  6. Include in export: This checklist allows you to include additional types of information in your export.
    • Empty columns: Include columns even if they have no data.
    • Specifications: Include detailed specifications of products.
    • Images: Include image public URLs associated with products.
    • Image alt tags: Include the alternative text for images.
    • Image groups & tiles names: Include Image groups names, and the related Image tile names.
  7. Publish as feed: Publish the export directly as a feed (URL).
  8. Name: A field to enter the name of the export. This could be used to identify the export within the PIM system for future reference.
  9. Filename: A field to specify the name of the file that will be created. If the file name is not changed, this field will take the same name as the "export name".

Related articles
No items found.
© 2024 KatanaPIM
DisclaimerSitemap